Sign up TODAY for Card Making News! Learn More >
- Home
- Card Making Tutorials
- Easel Cards
Easel Cards
Easel cards are a simple variation of the standard card fold with a distinctive look as they stand up like an "easel".
This makes them great to display on your mantel piece or window sill and can be made in different shapes and sizes.
For a standard easel card follow the step by step instructions below:
Step by Step
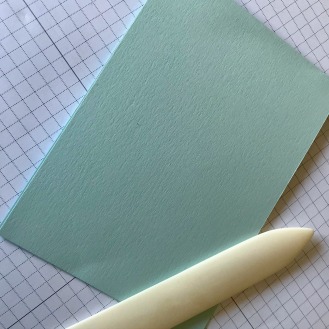
1. Cut a piece of card in half - either landscape or portrait.
This leaves you with two halves.
Use one half and fold in half with a bone folder.
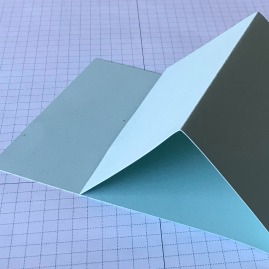
2. Fold one end into the middle and crease again with your bone folder. This gives you the basic shape to your card.
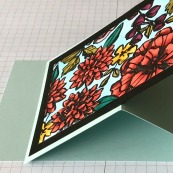
3. Cut a layer for the card front.
Add your own decoration.
Once completed stick to the lower half of your card front.
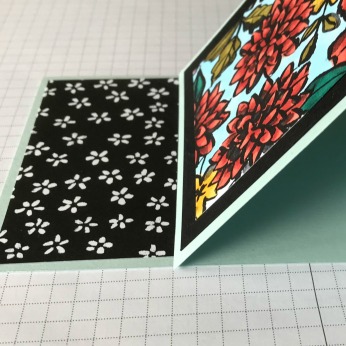
4. Cut a layer for the shelf.
Stick to the bottom section of the inside of the card base.
Add a label, sentiment or images to the layer with foam pads.
This provides a ridge or step to help raise your card into the easel position.
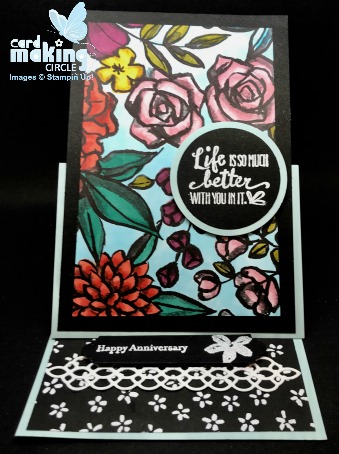
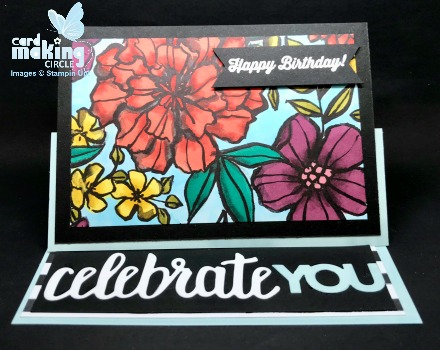
These two cards were created using similiar card making supplies with different results!
The top layer was created using designer paper coloured with alcohol markers.
The sentiments were heat embossed using white embossing powder to help them stand out on the black card.
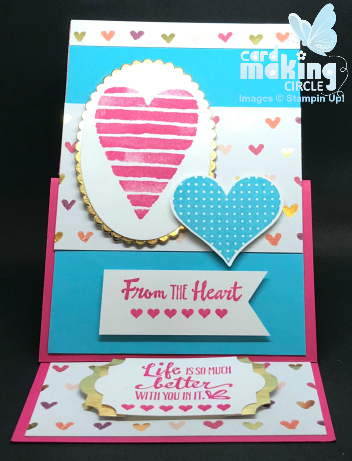
Our third card is a Valentines card that could also be used as an anniversary card or birthday card for a loved one.
The contrasting spring colours create a fresh bright look.
The gold surrounds add sparkle and pick up the gold hearts in the designer paper.
Both sentiments were cut with card making punches.
Now try something unusual....
Shaped Easel Cards
The most difficult part to creating a shaped card is cutting the card base as you need to ensure that the "top" part of the shape is left uncut.
For a circle card trace around a circular object.
Fold the card stock in half. Place the circular object on the card making sure that a part of the circle overhangs the folded edge.
Trace around the object and fussy cut the circle.
Once you have your card base fold the top half in half to create your easel.
You can use any shape you like!
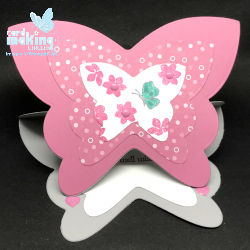
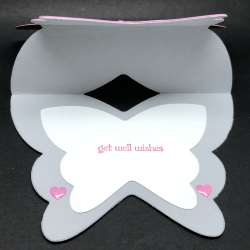
This card was created using a set of nesting butterfly dies for the shapes.
It was decorated with designer paper and small amount of stamping.
Embellishments were used to create the ridge to prop up the card.
Twisted Easel Cards
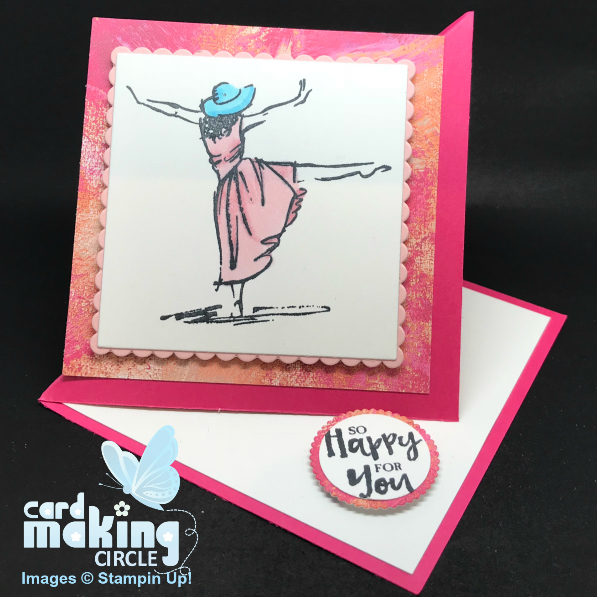
This card uses a square card base.
First cut your card base. I used 8" x 4" card to create 4" square card base.
Score across the diagonal on the front of the card. Fold in to create the easel.
Create a layer for the front panel and a sentiment layer raised on foam pads for the ridge on the inside of the card.
It's a great look yet so simple to make!
- Home
- Card Making Tutorials
- Easel Cards
