Sign up TODAY for Card Making News! Learn More >
- Home
- Card Making Techniques
- Block Printing
Block Printing for Card Making
Block printing originated in India as a way of repeating patterns on paper and fabric. It's a type of print making with wooden blocks.
Rubber stamps work in the same way as it enables us to stamp the same image over and over again.
Card makers have also found that their acrylic blocks can be used as stamps to create easy watercolour backgrounds.
The big difference is that every background is different as it's impossible to recreate exactly the same print twice.
Let's have a go!
First ink up an acrylic block with a water reactive ink (such as Distress inks or Altenew crisp inks) starting with the lightest colour.
Here I've used three colours.
Spritz the clear block with water.
The more water you use the more your colours will blend. Too much water you've got yourself a mess!
That's why you might want to experiment a few times on scrap paper.
Turn over the inked block and stamp it onto watercolour paper. Leave for a few minutes to allow the ink to seep into the paper.
Remove the block and leave the paper to dry.
When dry, stamp an image or sentiment onto your water coloured paper. Your acrylic block stamped image is now ready to make into a card.
Before starting your cards check out your card sizes and layers
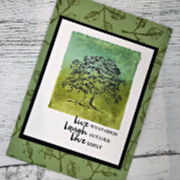
Explore - Tim Holtz

For this card I used a long oblong block with three Distress Oxide inks (scattered straw, frayed burlap and gathered twigs) with watercolour paper.
I dapped a few areas with kitchen towel and interestingly it turned the ink a verdigris colour which I think adds to the effect.
For the image I used the Paris sky line from the Cityscapes stamp set from Tim Holtz.
As I was making a masculine card it was mounted it on dark brown card and a wood effect designer paper.
The card was completed with a dark brown card base and an "explore" die cut (origin unknown).
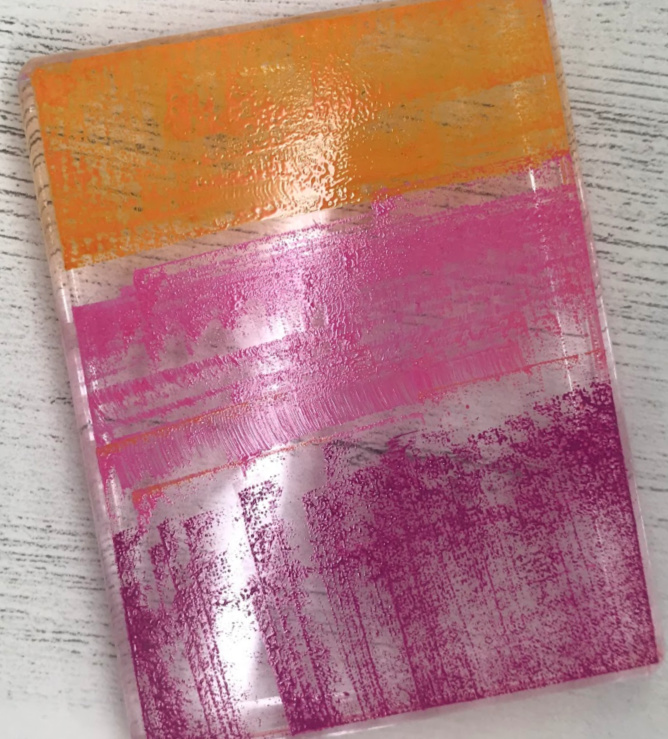
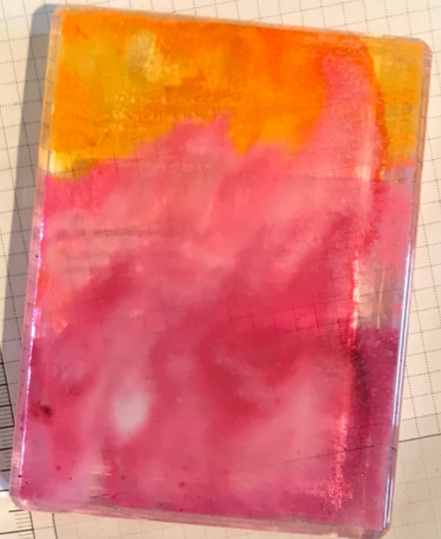
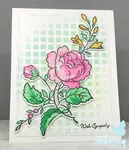
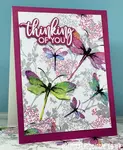
Just for You - Altenew
The wonderful outline stamp from Handpicked Bouquet from Altenew provides the focal image to this card.

I inked the block with three Distress Oxide inks (spiced marmalade, picked raspberry and seedless preserves).
This was spritzed with water and stamped onto water colour paper. When the paper was dry I stamped the outline over the watercolour ink with black pigment ink.
The paper was trimmed and mounted onto a matching layer before gluing to a white card base.
Finally, a heat embossed sentiment on a foam strip and matching pearls were added to finish the card.

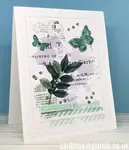
For You - Unity Stamps

This card uses the Keeping it Simple stamp set from Unity Stamps.
The tri fold card base measures 4 x 9" and was scored twice at 3" and 6".
The image panel was layered onto matching card and glued to the front panel.
Two other panels were layered with a patterned paper from the Essential Black and White paper pack from Altenew.
Complete with small matching pearls as embellishments.
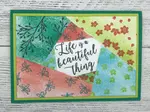
Floral Stem Collage - Poppy Stamps

The final card uses Distress Markers (twisted citron, salty ocean and blueprint sketch) to create the watercolour background.
The markers were drawn across the block and spritzed with water. When stamped I was left with a mottled dreamy effect - very different from the ink pads.
The top layer was die cut using a Wonky Stitched Rectangle die from MFT Stamps. The layer was then die cut with Floral Stem Collage die from Poppy Stamps to create a window.
The Floral Stem die comes with an additional die for the flower to layer on top of the flower head for added dimension. This was topped with an enamel dot at the centre to complete the card.
More Block Printing Cards....
Discover More Card Making Techniques....
Colouring for Card Making
Use colouring for card making on your handmade greeting cards.
Stencilling Techniques for Card Making
Create beautiful card backgrounds with stencilling techniques for card making.
Rub-Ons for Card Making
Save time by using rub-ons for card making for your handmade greeting cards.
Retiform technique
Learn how to do the Retiform Technique with step by step instructions.
Neurographic Art
Use neurographic art to create original handmade cards. It's so relaxing!
Napkin Cards
Save money by making cheap napkin cards from your left over paper napkins.
- Home
- Card Making Techniques
- Block Printing


FREE!
Card Making
Resources
in my

And
SIGN UP TODAY!
for more exclusive content