Sign up TODAY for Card Making News! Learn More >
- Home
- Card Making Ideas
- Cards with Tags
Cards with Tags

Creating handmade cards with tags are a great way to add interest to your cards. They can add a pop of colour, a touch of elegance, or even a fun twist to your creations.
They're a simple yet effective way to add a personal touch and instantly enhance the visual appeal of your cards.
You can use them on any type of card. From birthday cards to pop up cards to vintage cards.
They're so versatile!
A big plus for me is that you can make the tags in advance ready for when you need that special card.
So, grab your crafting supplies and I'll show you how to make your handmade cards shine with the addition of tags!
Materials and Supplies
Before you start let's look at the materials and supplies you'll need to create your tags.
You can choose pre-cut tags or create your own by cutting out shapes from patterned paper or card stock.
Pre-made tags are available in various shapes, sizes and colours. If you are going to use watercolours or pastes chose heavier mixed media tags such as those from Tim Holtz.
When making your own tags first decide on the size and shape. Choose heavy paper or card stock if you are going to pop up your tag on the card with foam tape or pads.
All of your card making materials and supplies will come into play with a few additions....
- Ribbon or twine - Look for ribbons or twines in colours that complement the colour scheme of your cards. Ribbons add elegance while twine or baker's gives a more rustic vibe. Tie into a bow or knot for a pretty and whimsical tag.
- Metal Charms - Small metal charms can be added for a unique and eye-catching tag.
- Eyelets - These small metal embellishments can be inserted into the tag using an eyelet setter or Crop-A-Dile. Then use the hole to thread twine to the tag.
With all of these materials on hand, you'll be well-equipped to make your handmade cards pop with tags.
Click on any Image to see the cards in Gallery format
Ideas for Cards with Tags
Let's take a look at my ideas for adding tags to your cards....
Use a Paper Pad - Many paper packs have pages with tags or sentiments that can be used to create tags. Use a different page from the pack as the background as they're always guaranteed to match!.

- Paper pad from Doddlebug Designs
- Cut tag from paper and add contrasting paper to back to strengthen tag.
- Punch hole for twine.
- Add sentiment to the tag.
- Create background to the card with matching paper.
- Cut a small strip paper and glue only at sides and bottom to create a pocket on the card front.
- Complete by adding twine and embellishments. Pop tag into the pocket.

Stamp It! - Use rubber stamps to create designs or messages on your tags. It’s a quick and easy way to add visual interest to your cards.

- Butterfly Party tag stamp from Penny Black Stamps
- Stamp with Onyx black Versafine ink
- Emboss with clear embossing powder
- Colour with markers or paint with watercolours.
- Die cut orange/yellow layer with Altenew Mix and Match Frame set
- Add a further layer before mounting on card base.
- Add sentiment.

Vintage-inspired tags - Use aged paper, distressing techniques, and vintage images. These create charming tags and will add a nostalgic touch to your gifts.
Give your tags a vintage or weathered look by distressing the edges with ink. Use a blending tool or sponge to apply ink around the edges of your tag for a worn and aged appearance.

- Cut tag with die from Sizzix tag set.
- Stamp text stamp over tag with dark brown ink.
- Blend Vintage Photo distress ink around the edges and gently over the front of the tag.
- Staple a strip of hessian to the front of the tag.
- Attach to card front with ephemera, sentiment and embellishments.

- Die cut two large tags from heavyweight kraft card stock.
- Die cut a background tag from vintage type patterned paper.
- Stamp and emboss images from a Crafty Individuals stamp set.
- Create layout using stamped images and emphemera.
- Add a metal sentiment from Tim Holtz Word Plaques and pins to complete the tag.
More Cards with Tags Ideas....
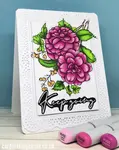
Floral-themed tags - Use pressed flowers, hand-drawn botanicals, or floral patterns. They create feminine tags for any occasion.
Personalised Messages - Instead of writing your message inside the card, consider writing it on the tag. This way, the recipient can keep the tag as a memento or bookmark.
Washi tape tags - Use colourful and patterned washi tape will create quick and easy tags. Mix and match different tapes for a fun and eclectic look.
Upcycled tags - Use old maps, book pages, or recycled cardboard. Get creative! You can make unique and eco-friendly tags with lots of character.
Tags with Ribbons or Lace - Attaching a ribbon or lace to the tag gives a luxurious feel to your handmade cards. It also provides extra texture and element to your design.
Watercolour tags - Use watercolour paints to create dreamy and colourful designs on your tags. Try different techniques. For example, use washes, splatters, or gradients. They will give a truly artistic touch.
Experiment with texture - Add texture to your tags with embossing folders or adding texture paste through stencils.
Embellished Edges - Give your tag a unique touch by embellishing the edges. Use scissors with a decorative blade or a border punch.
Tags with Ribbons or Lace - Attaching a ribbon or lace to the tag gives a luxurious feel to your handmade cards. It also provides extra texture and element to your design.
Have fun experimenting with different materials, techniques, and designs. They will make your handmade cards truly pop!

Attaching Your Tag
You need to make sure your tags are securely attached to your cards so they stay put through the post.
Many people use double-sided tape to attach tags. This allows you to easily stick the tag to the card without worrying about it coming loose.
Glue dots is another option and they don't leave a sticky residue.
A more traditional approach, is to use ribbon or twine.
Simply thread the ribbon or twine through a small hole in the tag, then tie it around the card in a bow or knot.
If tying over top of the card layer attach on the back with double sided tape before attaching the layer to the card base.
For a more unique look, consider using eyelets or brads.
Eyelets create a durable and eye-catching attachment that won't come loose over time.
Brads are small metal fasteners. They can be easily put into the tag and card to make a secure attachment.
Just punch a hole in the tag and card. Then, put in the brad and secure it by spreading its prongs.
No matter which method you choose. You must ensure that your tags are securely attached to your handmade cards. This will keep them in place during handling and shipping.
And Finally....
Adding tags to your handmade cards is fun way to make your cards stand out.
They are an easy way to enhance card designs and work for both experienced crafters and beginners.
Tags can be saved, displayed, or repurposed in various ways such as a book mark or hung from a hook. This adds to the sentimental value and longevity of your handmade card.
So, give it a go - your cards will be sure to pop with tags!
More Card Making Ideas
Card Making Ideas
Card making ideas to fire your imagination
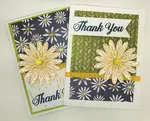
Daisy Cards
A collection of simple daisy cards made with one sheet of 12" x 12" patterned paper - the One Sheet Wonder method.
Card Making Inspiration
Visit my card making inspiration section for ideas to boost your creativity.
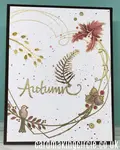
Autumn Card Making Ideas
Autumn card making ideas inspired by nature.
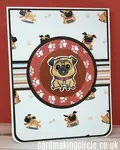
Dog Greeting Cards
Cute dog greeting cards that can be used for any occasion
Spring Greeting Cards
Brighten up your day with spring greeting cards in fresh and crisp colours.
Autism Greeting Cards
Make and share these beautiful Autism greeting cards for a loved one on the Autistic Spectrum. Or use the ideas to help raise Autism awareness.
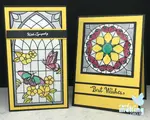
Stained Glass Cards
Have a go at creating beautiful Stained Glass Cards with different card making techniques.
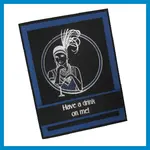
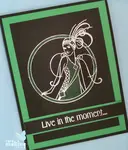
Art Deco Cards
Simple and elegant Art Deco Cards created in vibrant colours that reflect the 1920's
Cancer Encouragement Cards
Cancer encouragement cards to remind the people you love that they are valued and not forgotten.


- Home
- Card Making Ideas
- Cards with Tags


FREE!
Card Making
Resources
in my

And
SIGN UP TODAY!
for more exclusive content