Sign up TODAY for Card Making News! Learn More >
- Home
- Card Making Techniques
- Colouring for Card Making
Colouring for Card Making

Do you remember the joy of colouring as a child? Creating vibrant pictures with crayons and markers.
Well, colouring isn't just for kids anymore! With the right techniques and tools, you can use colouring for card making to bring your cards to life.
The first option for card makers, and the most basic one, is the delightful act of "colouring in".
This is simply the process of filling a defined area on your card with colour. This can be done using a variety of mediums such as coloured pencils, crayons, markers, or even paint.

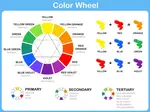
Mediums for Colouring
With many options, it's important to pick mediums that work for your budget, style and skill.
Popular choices include coloured pencils, markers and crayons. Each type of medium has it's own unique qualities. So, it's important to experiment to see which one you prefer.
A good choice for beginners is coloured pencils.
Not only are they accessible and affordable. They come in a wide range of colours and can be blended together to create different shades and textures.
With coloured pencils the quality definitely improves with price. Fortunately, they are often sold as "Open Stock" which means you can buy them one pencil at time.
Although it's easy to be tempted to buy a large box of cheap coloured pencils. It's better to start with a smaller box of quality pencils. This allows you to practice blending and shading techniques. Making your experience of using coloured pencils much more enjoyable

Another popular medium when colouring for card making is markers or colouring pens.
Many types of markers are available. They include alcohol-based ones, water-based ones, and even paint pens.
They are great for bold, vibrant colours. When choosing markers, consider their differences.
Duel-tipped markers (such as Copics and Ohulu) have two tips. At one end there is a fine point for intricate details and at the other a broad tip for colouring larger areas.
Tri-blend markers (from Spectrum Noir) have three tips in one marker. Each section has three shades of the same colour. These are fantastic for blending and a cheaper way to build up a stock of different colours. With the colour choices for blending made for you it makes for quicker colouring.
Alcohol markers provide a smoother finish that looks more professional. However, alcohol markers bleed through most card to the back. So, never use them directly onto your card base. Always use a card layer or cut out your image before adhering to the card front.

Gel pens are readily available and come in a wide array of colours. Metallic gel pens will add a bit of shimmer to your cards.
Crayons come with many options from children's Crayola crayons to artist quality. They are easy to use and come in a wide variety of colours.
Crayons have a unique texture and are more difficult to blend.

For a more unique approach, watercolours can be an ideal choice. They add a soft and artistic touch to your design.
Ink pads can be used as an alternative to watercolours as many are water reactive.
You can also use a combination of mediums. I often use coloured pencils over alcohol markers and watercolour to add more detail. And sometimes add an under colour of alcohol markers before using coloured pencils.
Remember, there is no right or wrong way to colour your cards.
Finally, consider the paper you're using as well. A good quality paper can make a big difference when it comes to colouring, so use the correct paper for the medium.

Colouring Techniques
Blending and shading techniques help create depth and dimension in your colouring.
There are different blending techniques for each medium.
For coloured pencils.....
- Use a blending pencil or blending stump to gently smudge the colours together. Start by colouring with your lightest colour, then layer your darker colour. Use the blending tool to softly blend the edges where the colours meet.
- Burnishing - To burnish, colour over your entire area with a light layer of your lightest colour. Then, layer your darker colours with a light hand. Gradually layering multiple colours.. This technique creates a vibrant, polished look that makes your colours pop.
- Blending fluid - Such as Gamsol (100% pure odourless mineral spirit). Use with a blending stump. This is the easiest but it does dull and flatten the colour. You dip the stump into the fluid and gently blend the colours together.

For alcohol markers....
- Start with lighter colours and gradually building up to darker shades. This will help you avoid any harsh lines between colours and create a more blended and natural look. Work quickly to keep the ink wet, which will make blending easier.
- Use a colourless blender marker. This helps you blend colours together and soften harsh lines. The blender marker can also be used to lighten areas.

For watercolours....
- Use wet on wet technique - Start by wetting the paper with clean water and then add your chosen colours while the paper is still wet. The colours will naturally blend and bleed into each other. This creates a soft and seamless transition between shades.
- Use a damp brush - for a more controlled blending effect.

Shading adds depth to your colouring. It involves creating areas of light and shade to give a three-dimensional appearance.
A small amount of shading can make a big difference. Use a darker colour to layer over another colour in areas that would be shaded from the light.
If colouring in a stamped image there are often clues as to which part of the image should be darker.
The opposite of shading is highlighting. For this I use a white gel pen(s). A simple line or white dots can be enough to make an area pop out.
Card makers everywhere are always on the search for the perfect white pen. Sometimes they work and sometimes they don't ! My only advice is check it's working on a scrap bit of paper first and press lightly!
Colouring for Card Making Resources
Over the years I've taken quite a few online online classes and gathered resources to improve my colouring. Here are my recommendations....
Kit and Clowder Colouring Classes - for both coloured pencils and markers. Alyce offers free downloads of colour charts for different makes of pencils and markers. They are an excellent resource for printing and keeping in a folder when you colour. The courses are brilliant too!
Sarah Renae Clark - for colouring books and tutorials. The Color Box is an invaluable resource if you do a lot of colouring. It's available as a download version and as boxes. There are over 500 colouring charts to chose from and conversion charts for different brands of mediums.
Online Card Classes - offers a Copic colouring course. Presented by Jennifer McGuire and Kristina Warner - both accomplished card makers.
Sandy Allnock - Excellent for her Hex Charts for alcohol markers and coloured pencils. They are well worth the cost as they will save you stacks of time when deciding which colours to use. I haven't taken any of her courses.
And Finally....
Colouring for card makers indeed offers many options. Whether you prefer the tactile nature of pencils and pens, or wish to experiment with watercolours the choice is yours.
Keep exploring, keep experimenting, and most of all, keep creating beautiful cards.
More Card Making Techniques
Card Making Techniques
Discover how to use different card making techniques to make your cards sparkle
Retiform technique
Learn how to do the Retiform Technique with step by step instructions.
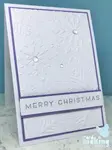
Embossing Techniques
Create awesome effects with different embossing techniques to take your cards to the next level
Embossing Techniques Step Two
Heat embossing techniques to make your cards stand out from the crowd
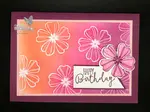
Ink Blending for Card Making
Create a gradient effect on your card backgrounds by Ink blending your stamp colours together.
Stencilling Techniques for Card Making
Create beautiful card backgrounds with stencilling techniques for card making.
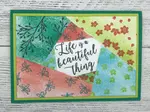
Layered Stamps for Card Making
Create cards with layered stamps for a beautiful 3D effect.
Inlaid Die Cutting for Card Making
Try Inlaid Die Cutting - It's a fun way to create an imaginative designs on your handmade cards.
Emboss Resist
Create unique and interesting effects with the emboss resist technique
Block Printing for Card Making
Have a go at block printing with your acrylic blocks to create easy watercolour backgrounds
- Home
- Card Making Techniques
- Colouring for Card Making


FREE!
Card Making
Resources
in my

And
SIGN UP TODAY!
for more exclusive content