Sign up TODAY for Card Making News! Learn More >
- Home
- Card Making Techniques
- Gelli Printing
Gelli Printing

Gelli printing is a fun way to create unique backgrounds for your handmade cards.
It's a wonderful opportunity to de-stress especially if you tend to be a bit of perfectionist (like me!) as you have to let yourself go and enjoy the process.
And if your mojo has flown away it's a no pressure way to be creative without worrying about the results.
So, what do you need to get started?
Gelli Plate
The gelli plate is a reusable printing surface made from non porous mineral oil. You can make your own, but as time is my enemy I purchased mine.
What size gelli plate should you buy?
It all depends on what you want to use it for!
There are lots of different sizes available up to 16" x 20". Small shapes such as squares, triangles and circles are good for card fronts.
As I make cards I bought a small 3" x 5" plate and a 6" x 6" plate.
My 6" x 6" card making stencils are a perfect fit for the 6" x 6" plate. I also purchased a 7" x 7" Mega Mount from Clarity Stamps to make it easier to move the plate around.
For smaller plates you can use a large acrylic block from your stamping stash.
I will buy a larger plate to make full sheets of patterned paper that I can cut up for batch card making. But that's for the future!


Brayer
Brayers are rollers with handles. These too are available in a variety of sizes.
You should use a soft rubber brayer as this spreads the paint or ink over the gelli plate smoothly.
I use a Speedball brayer with a 4" roller and this works well for me.
Paint and Other Mediums
In the first instance start with what you have.
I started with my Distress Oxide inks using printer paper. Dye based inks may stain your gelli plate.
The recommended medium is acrylic paint. There are lots of different brands to chose from available at a range of prices.
I use the range from my local craft store.
The Dina Wakley and Dylusions range are a popular as they have bright and cheerful colours.
More expensive makes include Deco Art, Americana and Golden Open acrylics.

Paper for Gelli Printing
You can use any almost any type of paper with your gelli plate. As you use a lot of paper start with printer paper especially when you are practicing.
When you feel confident using your plate try different papers and card.
If you want to use your prints for collage use Deli paper, a fine translucent dry wax paper sold in boxes of 500 sheets.
Textures and Patterns
There are specialist texture tools you can buy for your gelli printing.
But there's no need to go out and spend lots of money as you can add texture with household items. Such as bottle tops, bubble wrap, corrugated cardboard, string, fabric and leaves.
Be careful not to use anything sharp as this may puncture the plate.
Stencils are also an ideal way to add pattern and texture to your designs. Your card making stencils are ideal - wash them straight away before the paint drys.
Use Embossing folders to create positive and negative patterns. Again wash quickly after use.


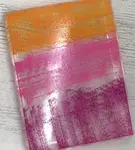
🎉 Creating Your First Print 🎉
Once you have all your supplies it's time to create your first print.
- Squeeze your paint onto the gelli plate. A couple of small blob is enough to start.
- Slowly use the brayer to spread the paint to cover the plate. Add more paint if required or blobs of another colour if you want to make a blend. Use colours next to each other on the colour wheel to avoid creating a muddy mess.
- Brayer off any excess paint to a scrap sheet of paper to the side of your plate.
- Lay a piece of paper over the plate rubbing the top of the paper with your hand.
- Slowly peel back the paper to reveal your first print.
- Add another piece of paper to the top of the plate to take a second print - known as a "Ghost Print".
These are the basic instructions to creating a print. Step it up a notch by adding a stencil or other textures on top of the paint to create pattens.
As you get more confident try adding layers of paint. Allow each layer to dry before adding another layer.

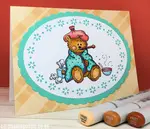
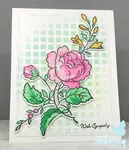
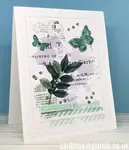
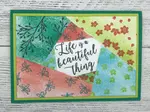
More Gelli Printing Cards....


Need More Information...
Take time to watch You Tube instruction videos by the two manufactures of gelli plates....
Gel Press
Gelli Arts
And check out some excellent artists to discover additional techniques. I would recommend.....

Discover More Card Making Techniques....
Colouring for Card Making
Use colouring for card making on your handmade greeting cards.
Stencilling Techniques for Card Making
Create beautiful card backgrounds with stencilling techniques for card making.
Rub-Ons for Card Making
Save time by using rub-ons for card making for your handmade greeting cards.
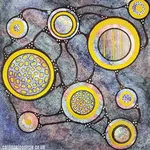
Retiform technique
Learn how to do the Retiform Technique with step by step instructions.
Neurographic Art
Use neurographic art to create original handmade cards. It's so relaxing!
Napkin Cards
Save money by making cheap napkin cards from your left over paper napkins.
Card Making Techniques
Discover how to use different card making techniques to make your cards sparkle
Block Printing for Card Making
Have a go at block printing with your acrylic blocks to create easy watercolour backgrounds
- Home
- Card Making Techniques
- Gelli Printing


FREE!
Card Making
Resources
in my

And
SIGN UP TODAY!
for more exclusive content